Introduction to Git and GitHub
Git is a source code version control system (VCS), also known as version control. GitHub is as website providing Git repository hosting and an attractive and powerful Git web interface. Version control systems are at the heart of how programmers manage and share source code. Both Git and GitHub are extremely commonly used in the world of software development, and you will benefit greatly from familiarity with them.
Note that if have not installed Android Studio you should do that first. Return here when you’re done.
1. Why Use Source Version Control?
A source code repository is a bit like the shared folders that are provided by services like Dropbox, Box, and Google Drive. You can save files and folders and share them with other users in various ways. Some of these tools even track allow you to undo and redo changes and see how files have changed over time. These are useful tools, and a great way to collaborate with others in a variety of different scenarios. So it’s normal to wonder: what’s different about source version control?
Compared to tools like Dropbox, source version control provides programmers with several important advantages.
1.1. Versioning Entire Projects
First, version control systems track the version of all the files in each repository, rather than individual files separately. Programming frequently involves making a set of changes to a group of files that together accomplish something—like fixing a bug or adding a new feature. So when you commit your work using Git, it remembers the state of all the files in your repository at that time. This allows you to compare what your project looked like at different times, and undo an entire set of changes that might have caused a problem.
Note that this also means that Git does not track all the changes you save to a file. Unless you commit your changes, they are not saved to your repository. This may seem like an annoyance—after all, systems like Dropbox will sync your files every time you save them.
But when programming this turns out to be a huge advantage.
Let’s say you save a version of Foo.java to test—but it contains errors.
Now if you are using Dropbox, everyone has that broken version of the file.
But if you are using Git, you can test your code, notice the errors, and fix
them before committing.
A Git commit is really their equivalent of the save operation. Regardless of whether you save your files in Android Studio or any other way, you have to add commit them to your repository before it will save and remember them.
1.2. Version Comments
Version control systems also allow you to add your own notes to each commit. This is called a comment. Comments should summarize what changes are included in the new version of the project. Good comments are extremely helpful to other developers that are trying to understand how the code is evolving. All version control systems have ways to view the list of version with their comments. This can be useful when you want to see how things have changed, or back up and use an older version of a project where some feature was working that isn’t any more.
1.3. Merging Changes
Second, version control systems help you merge changes made by different
developers—even to the same file.
Say that Foo.java has 1000 lines.
Alice makes a change at the top of the file.
Concurrently, Bob makes a change to the bottom of the file.
Systems like Dropbox will typically force you to address this conflict by
choosing either Alice’s version of the file or Bob’s.
But version control systems can frequently automatically merge
non-overlapping changes to source code files—allowing you to choose to
combine the changes from Alice with the changes from Bob.
When you are working in large teams on large software projects, this
capability is extremely handy.
2. Introduction to Git and GitHub
Now let’s go through the basics of how to use Git. But please don’t consider this guide exhaustive—there are much more useful and up-to-date guides all over the internet.
2.1. Basic Principles
Git organizes your files into a repository. A repository can contain any number of files organized any way you like. A single repository usually contains all of the code used by a single project. For CS 125, you will use a single repository for each MP 1.
Git stores a copy of your repository on your local machine. But to submit and to backup your work, you are going to push your changes to the GitHub Git hosting service. So first we have to create a GitHub account and configure Android Studio to use it.
2.2. Joining GitHub
Joining GitHub is simple! If you don’t already have an account, head to this page to sign up. It’s quick, free, and painless.
If you already have an account, just keep using it for your CS 125 assignments.
Note that there is also no requirement that you identify yourself as a CS 125 or
even as an Illinois student with GitHub to submit your CS 125 assignments.
We’ll discuss how to identify yourself your submissions
later.
However, if you add your @illinois.edu email to your profile as your primary
email address, it will improve integration with our official grading system.
3. CS 125 Git Workflow
Almost all of your interaction with Git this semester will be through two powerful interfaces: the Android Studio IDE and GitHub. Let’s walk through a typical MP workflow to get a sense for how you will normally be using Git.
3.1. Cloning the MP Starter Code
To begin the MP 2 you will use a special link to clone a Git repository on GitHub. That repository contains starter code that we provide for each assignment, including completed portions of the assignment and testing suites. Cloning a Git repository on GitHub makes a copy of it that you now have permission to modify.
It is straightforward to start a new Android Studio project Using an existing GitHub repository—either one you created or one that was created for you when you accepted our MP invitation link. Simply choose the "Check out project from Version Control" option in the main Android Studio menu and then select "Git".
Paste the link that you obtain when you choose "Clone or download" at the GitHub
page for your project.
It should look like
https://github.com/cs125-illinois-students/MP-Spring2020-username.git,
where username is your GitHub username.
If you have not yet added your GitHub credentials to Android Studio, it will ask you to do that. At that point Android Studio will download the code from GitHub to your local machine and allow you to begin making and testing your changes.
Note that you should never use the "Download ZIP" or "Open in Desktop" options on GitHub. These will result in an incorrect project setup that is impossible to fix, and you will need to start over at that point.
3.2. Identifying Yourself
Before you can run the local autograder or receive credit for a submission, you
must identify yourself.
This links your @illinois.edu identify to your repository so that you can
receive credit for your work.
In the root directory of each project you will submit, there is a file called
email.txt.
In Android Studio you’ll need to switch to the project view to locate this file.
Enter your @illinois.edu email address into that file on a single line.
Note that it is critical that you do this properly. If you enter an incorrect email address, you will not receive credit for your work. If you enter the email address of another student, we will investigate your submission for plagiarism and potentially file a FAIR report.
3.3. Running the Autograder
As you complete each assignment, you’ll want to track your progress and get a sense of how you are doing. To aid with that process, we’ve provided an autograder that you can run as many times as you like. Each time, it estimates the score that you’d earn on the assignment.
Please note that the autograder only provides an estimate of your score. While we have tried as hard as possible to make the autograder run similarly on your machine and in official grading, it is impossible to ensure identical behavior. So use the autograder to estimate your score as you go—but be sure to submit and view your official score before the assignment deadline.
3.4. Committing (Saving) Your Work
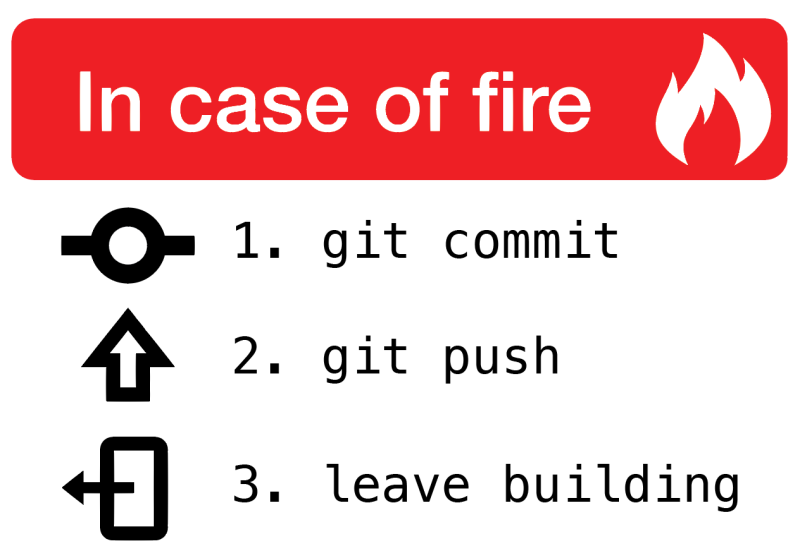
Version control systems only save the change you have made when you tell them to. This is called a commit, and the process called committing. Given that committing is essentially saving your changes, this have given rise to memes like the one on the right.
Once you commit a version of a file, Git will remember its committed contents forever—even if you change or delete it the file. So you should get into the habit of committing early and often. Here are some good times to commit your code:
-
You just started a project—make sure to record it in its initial state!
-
You just finished writing a function—that way you can always get back to that version if you make changes later.
-
You just passed one test case—make sure that Git remembers what worked forever!
-
You are about to take a break or go to bed.
-
The MP deadline is in thirty minutes—or in five minutes!
Get in the habit now of committing your code regularly. Version control systems are very efficient at storing commits, and so the overhead of performing them is small. Better to have things saved than to want desperately to get back to a previous version or remember how you did something and not have it committed.
Note that most version control systems will require you to tell them the first time you want to add a new file to a project. Once you do this once, that file will be tracked in the future—but there is an initial step that you may sometimes miss. However, Android Studio is good about reminding you about this, as long as you don’t disable those reminders.
Android Studio has a convenient interface for committing changes, adding commit messages, pushing to GitHub, and generally tracking the state of your repository.
**Please keep in mind that committing does not submit your work. That is a separate step that you need to complete as described below.
3.5. Pushing and Submitting Your Work
For CS 125 you submit your work by pushing it to GitHub. We will grade each version of your MP that you push and provide you with the best score modulo penalties and other score calculations.
You must push to GitHub for us to grade your work on the MP. Don’t consider yourself done with a checkpoint until you see the score that you think that you have earned on the grades page. If more than 15 minutes go by after you push and you still don’t see your grade on the grades page, begin the troubleshooting steps described below.
3.6. Troubleshooting the Submission Process
Except around deadlines, MP grading usually completes quite quickly. In most cases you’ll see your latest submission show up on the MP grades page within a few minutes. However, if you submit right before a deadline, you may need to wait longer—maybe even several hours. Note that there is no need to reload the page: it will update automatically.
If you don’t find your commit there here are some common problems:
-
You forgot to push your work. This is a common mistake. You committed your work, but didn’t push it to GitHub. Try pushing again by selecting push under the "VCS → Git" Android Studio menu. If you have already pushed your work this will do nothing, but if you have not it will actually submit your changes for grading.
-
Your submission isn’t graded yet. If you submitted right before a deadline, you may need to wait several hours for grading to complete. As a reminder, you can and should use our local autograder to estimate your score as you work. Don’t submit until you are confident that you have earned the score that you are aiming for.
-
Your commit is there, it just didn’t get the score you thought it would. We put your best commit at the top of the list. If you newer commit doesn’t score as well, it will end up below your best commit, meaning that you might miss it. And when two best commits earn the same score we place the oldest on top, not the newest.
-
You didn’t enter your email correctly into the
email.txtfile. This is probably the most common problem. If you don’t enter your email address correctly we have no way to know that it’s you! So double- and triple-check that your email is correct. -
checkstylecouldn’t parse one of your files. Ifcheckstylecan’t parse one of your files then the entire build fails before we have a chance to record your email address. Note that this is different than acheckstyleerror—it means that the file was not valid Java syntax, and usually wouldn’t have compiled anyway. Currently any syntax errors that causecheckstyleto fail in any of your sources files will fail the entire build and cause you to not receive a grade. We hope to fix this limitation in a future release of our grading plugin. -
You’re pushing the the wrong repository. You should be pushing to a repository in the
cs125-illinois-studentsorganization. If you’ve somehow created another repository on GitHub, remove it immediately once you’ve pushed to the correct repository. It can put you at serious risk for committing an academic integrity violation.
4. How to Learn More
As usual the internet is the best way to find out more about anything related to technology. There are great Git tutorials out there that you can find on Google. And feel free to ask questions on the forum.